The Microsoft Teams integration
NOTE This integration is separate from the MS Teams integration that enables sending messages and meeting links to Autotask contacts and resources. Refer to MS Teams.
About the Microsoft Teams integration
ALERT Announcement by Microsoft - Retirement of Office 365 Connectors for Microsoft Teams:Retirement of Office 365 connectors within Microsoft Teams. Microsoft has chosen to drop support for the Microsoft Teams Connectors, including Webhook Connectors used by our Microsoft Teams integrations for Autotask, BMS, and Kaseya Quote Manager. Existing Microsoft Teams Connector Webhooks will continue to function until March 2026, per Microsoft's announcement.
The Autotask integration with Microsoft Teams provides users with an alternate method for receiving the notifications generated by ticket workflow rules. Instead of a mailbox, the notification is sent to a webhook URL and posted in a Microsoft Teams channel. The workflow rules define the events and conditions as well as the Teams channel the notification is posted to.
Each post contains the following information: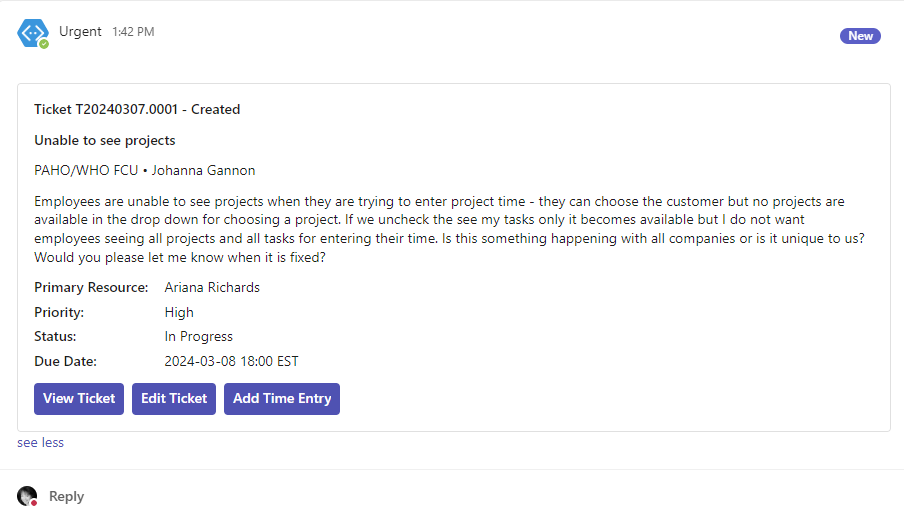
- Ticket Number
- Event
- Ticket Title
- Organization
- Contact
- Description
- Primary Resource
- Priority
- Status
- Due Date (all dates and times is presented in your organization's default time zone)
Below the information fields are three action buttons:
- View Ticket
- Edit Ticket
- Add Time Entry
Clicking a button will open the respective ticket or time entry page in Autotask. If you are not logged in, you will be asked to authenticate.
NOTE If the pages do not open, make sure that popups are allowed for *.autotask.net.
Configuration
To set up the integration, the following steps are required in Autotask and Microsoft Teams:
In Microsoft Teams, you set up the team and channel or channels that will generate the workflow that establish the connection to Autotask and receive the notifications.
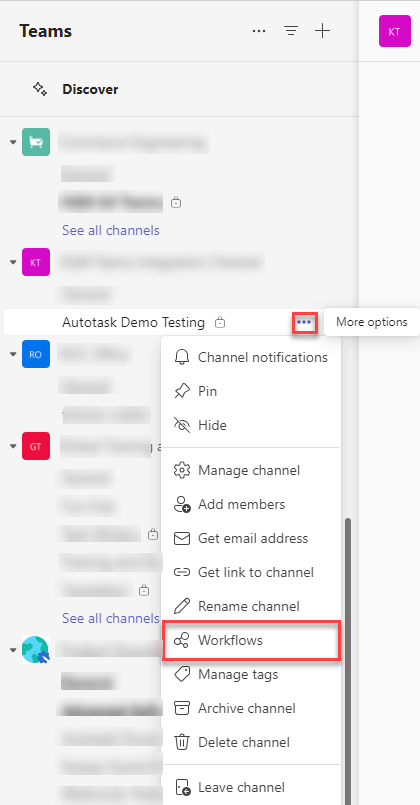
To create a workflow for a channel do the following:
-
In a Teams channel, click on the 3-dot menu and click Workflows.
-
Depending on if you want the workflow to post within a chat or channel, choose the workflow template that best suits your needs. Each template has a different authentication type.
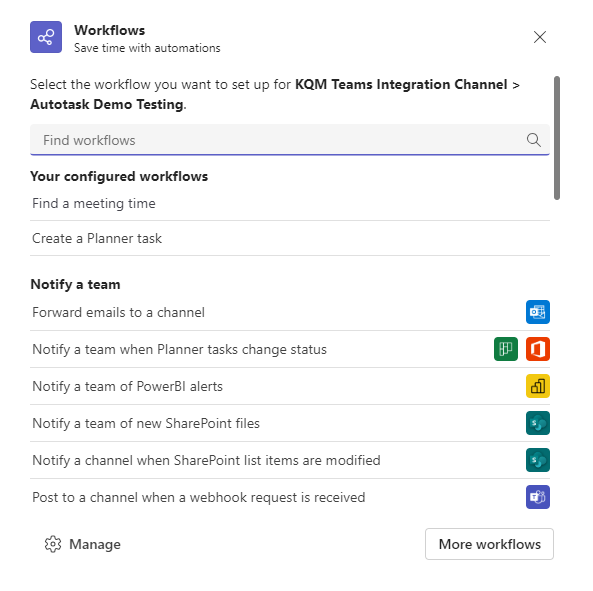
Once the workflow opens, you have the option to change its name.
-
Click Next.
NOTE If you want to choose a different account to authenticate with, click Switch account and choose the account you want to use.
-
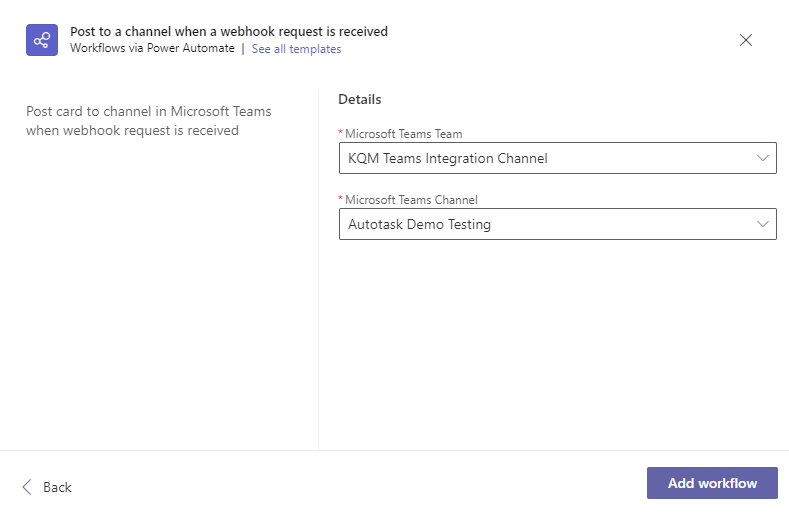
On this page you’ll be able to choose the team, channel, or chat that this notification will post to. Please note that this screen may take extra time to fully load.
-
After filling out the required details, click Add workflow.
Once the workflow is created, you’ll see a new dialog with the URL that you can copy. If you ever need to copy the workflow URL again, you’ll be able to find it by opening the Workflows app within Teams, selecting the workflow that was created, selecting Edit, and expanding the trigger When a Teams webhook request is received.
The final step is to configure ticket workflow rules to post notification emails to a Teams channel instead of, or in addition to, sending an email notification.
Do the following:
- Create or edit a ticket workflow rule. Refer to Adding, editing, and copying workflow rules.
NOTE In this first iteration, tickets are the only entity that is supported.
- Scroll to the very bottom of the workflow rule form's General tab,
- Select Actions: Post in Microsoft Teams Channel.
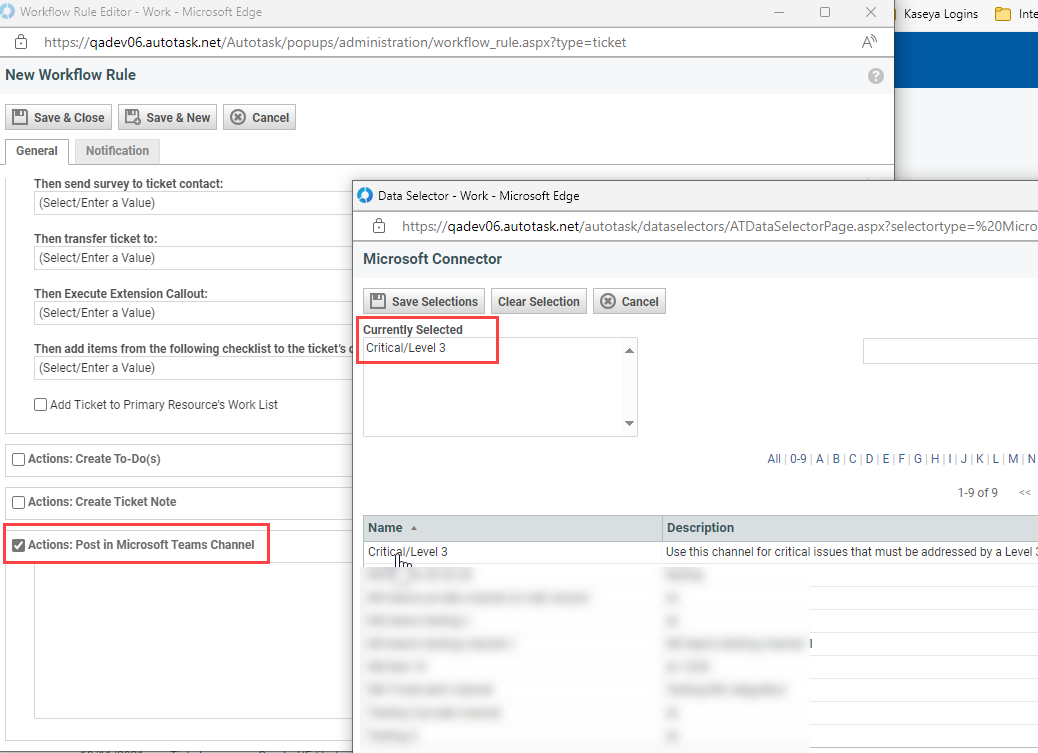
- Select one or more channels to post the notifications to. You can associate up to 10 separate channels with one workflow rule.
- Click Save & Close.
Every time the workflow rule fires, the notification will be posted to the selected channels.
Limitations and restrictions
At this time, only the Ticket entity is supported.
Each customer can create up to 100 Microsoft Teams connections in Autotask.
The message size and rate limits for Workflows are determined on the Microsoft side. Limits are based on your current subscription with Microsoft. For more detailed information, refer to limits of automated, scheduled, and instant flows.
| Parameter | Limit |
|---|---|
|
Message size |
28KB |
|
Rate |
4 messages/second 60 messages/30 seconds 3,600 messages/hour 86,400 messages/day |
IMPORTANT This table reflects information regarding the message size and rate limits of Office 365 Connectors for Microsoft Teams. With Microsoft discontinuing the use of Connectors, this information will be deprecated at a later date. Refer to About the Microsoft Teams integration.


